From mini to maxi: discover the perfect kitchen garden for beginners
Learn how to set up a great kitchen garden as a starting gardener, from mini balcony garden to large allotment garden. Discover the power of companion planting and enjoy your own harvest!
Whether you have a small balcony or a spacious garden, with the right approach you can grow fresh vegetables and herbs anywhere. Learn how to set up a healthy kitchen garden step by step, discover smart combinations of plants, improve the soil with compost, protect your crops against snails and drought, and enjoy the pleasure of your own harvest in the Dutch climate.
Preparation and cultivation
Soil preparation and structure
A fertile soil is the basis of every successful kitchen garden. Start by loosening the soil and removing stones and root debris. Mix well-decomposed compost or old farmyard manure with the top layer to improve the structure and stimulate soil life. In the Dutch climate it is wise to do this in early spring, so that the soil can warm up and excess moisture can drain. Check the pH value and adjust it with lime or peat, depending on the crops you want to grow.
Sowing and growing young plants
Use clean seed trays or pots with airy seed soil and keep the soil slightly moist, not wet. Place the seeds in a warm, bright place, for example on a windowsill or in a small greenhouse. As soon as the first leaves appear, give the plants more light and slightly cooler conditions to make them strong. In the Netherlands you can start sowing indoors from March, so that the young plants are ready to be planted outside after the last night frost.
Harden off and plant out in the open ground
Before you take young plants outside, they have to get used to wind, sun and temperature differences. Place them outside in a sheltered spot during the day for a week and bring them back inside at night. This way you prevent growth stress and burnt leaves. Only plant out when the soil has warmed up sufficiently and there is no longer a chance of frost, usually from mid-May in the Netherlands. After planting, water generously and, if necessary, protect the young plants with a fleece cloth against cold nights or bright sun.
Planting and care
The right timing for planting out
Wait before planting until the risk of night frost has passed, usually after mid-May in the Netherlands. Check whether the soil has warmed up enough and is not too wet. Plant young vegetable plants on a cloudy day or in the evening to avoid sunburn. Water generously immediately after planting so that the roots make good contact with the soil. Take plant spacing into account so that each plant gets enough light and air to grow healthily.
Care after planting
After planting out, regular watering is essential, especially during dry periods. It is better to water less often but deeply so that the roots grow deeper. Remove weeds to prevent competition for nutrients and mulch the soil with straw or compost to retain moisture. Check for snails and aphids weekly and take timely action with environmentally friendly means. This will keep your plants strong and productive throughout the growing season.
Nutrition and support during growth
Once the plants are well established, you can support them with natural fertilizers such as compost tea or nettle liquid. Tall crops such as tomatoes or beans benefit from stakes or rope guidance to prevent falling over. Regularly remove damaged leaves and prune where necessary to promote air circulation. Monitor growth and provide extra nutrition if there are signs of yellowing or slow development. This way you stimulate a rich and healthy harvest.
Harvest and store
When is the right time to harvest
Harvesting is done when vegetables and herbs have reached their full flavour and texture. In the Netherlands this often means early in the morning or on a cool day, so that the plants do not become limp from the sun. Check regularly whether fruits are firm and well colored. Root vegetables can be carefully pulled out of the ground, while leafy vegetables are better cut with a sharp knife. By harvesting at the right time, you extend production and enjoy fresh, tasty yields for longer.
Smart storage for longer shelf life
After harvesting, it is important to store vegetables and herbs properly. Do not wash them immediately, but remove excess soil and let them dry. Store root vegetables in a cool and dark place, for example in a cellar or crate with sand. Leafy vegetables stay fresh longer in a damp cloth in the refrigerator. Herbs can be dried or frozen to preserve their aroma. By storing smartly, you prevent waste and you can enjoy your own harvest for weeks.
Preserving, drying and freezing your harvest
When you have harvested bountifully, canning, drying or freezing is an excellent way to preserve the flavors of the season. Tomatoes and courgette can be preserved in jars with herb oil or vinegar, while beans and peas freeze well after briefly blanching. Herbs dry best in an airy place out of the sun. By using these techniques, you will build a stock that will remind you in winter of the summer bounty of your kitchen garden.
Dutch practice: From mini to maxi: discover the perfect kitchen garden for beginners
Monthly planning for Dutch conditions
Plan From mini to maxi: discover the perfect kitchen garden for beginners based on Dutch seasons and not on general international schedules. In most regions, soil development starts from February or March, with planting out after the last chance of night frost around mid-May. In coastal areas, the soil often warms up later due to wind, while sandy soils warm up faster than clay. Work with a fixed weekly check per month: soil temperature, precipitation, disease pressure and growth rate. This way you steer based on the real Dutch weather instead of just a calendar date.
Soil choice in the Netherlands: clay, sand and peat
For From mini to maxi: discover the perfect kitchen garden for beginners, soil management in the Netherlands is decisive. On clay, structural improvement with compost and mulch helps to prevent silting. In sandy soils, moisture retention is the priority with organic matter and gentle, deeper watering. On peat soil you pay extra attention to nutritional deficiencies and a stable pH. Choose one approach per bed and evaluate it after each rainy period, because Dutch showers can cause a lot of leaching or waterlogging in a short time. By making soil choices explicit, the chance of success visibly increases.
Limiting weather risks in practice
In the Netherlands, prolonged rain, sudden temperature changes and snail pressure are the most common risks. Therefore, work preventively: sufficient plant distance for air circulation, water at the base instead of over the leaves, and a quick inspection round after wet days. When in doubt, stick to a simple decision rule: first drainage and air, then nutrition, and only then action against pests. This prevents overcorrection and makes From mini to maxi: discover the perfect kitchen garden for beginners more consistent throughout the season, even in changeable years.
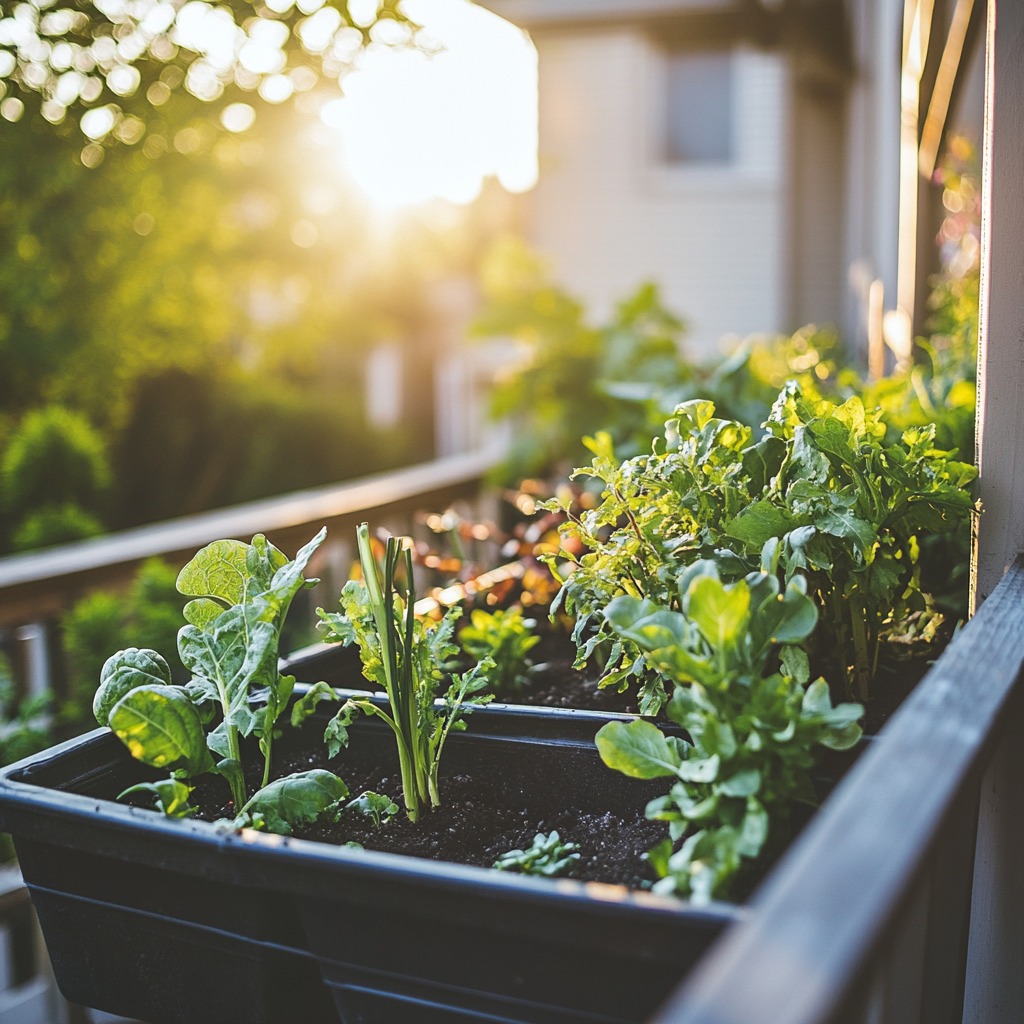
Adjustable kitchen garden box made of sustainable wood
Ideal for novice gardeners with limited space. This raised container ensures good drainage, prevents cold feet on plants and makes it easy to combine different vegetables and herbs. Thanks to the durable wood and the adjustable height, you can work comfortably and enjoy a healthy harvest, even on a balcony or small city garden in the Dutch climate.
View productStarter set of organic vegetable seeds
A complete set with easy-to-grow seeds such as lettuce, radish, carrot and basil. Specially composed for beginners who want to learn how to sow and harvest in different seasons. The seeds are organically grown and suitable for pots, containers or open ground, so you can grow fresh vegetables all year round in the Dutch climate.
View productCompost bin with aeration system
Handy container to convert kitchen and garden waste into nutritious compost. The aeration system speeds up the process, so you quickly have natural food for your kitchen garden. The closed design keeps it tidy and low-odor, while working well in the humid Dutch climate and helping to reduce waste.
View product