Asparagus
Learn how to grow asparagus successfully with proper care and soil preparation for a bountiful harvest.
With the right preparation and care, you can enjoy tender, home-grown asparagus in the Dutch spring. A loose, well-drained soil and sufficient sun form the basis for a rich harvest. By paying attention to fertilization, watering and timely removal of weeds, the plants remain healthy and productive. Learn step by step how to grow, maintain and harvest asparagus so that you can enjoy this delicious spring vegetable every year.
Preparation and cultivation
Soil preparation for asparagus beds
Start with a deeply loosened, sandy soil that drains well but does not dry out. Work well-decomposed compost or old farmyard manure into the top layer in autumn or early spring to improve the structure. Avoid heavy clay soil or improve it with coarse sand. Check the pH value and aim for slightly calcareous conditions. By leveling the soil in a timely manner and making it weed-free, you create a healthy basis in which the asparagus plants can develop strongly in the coming years.
Plant material and plantings
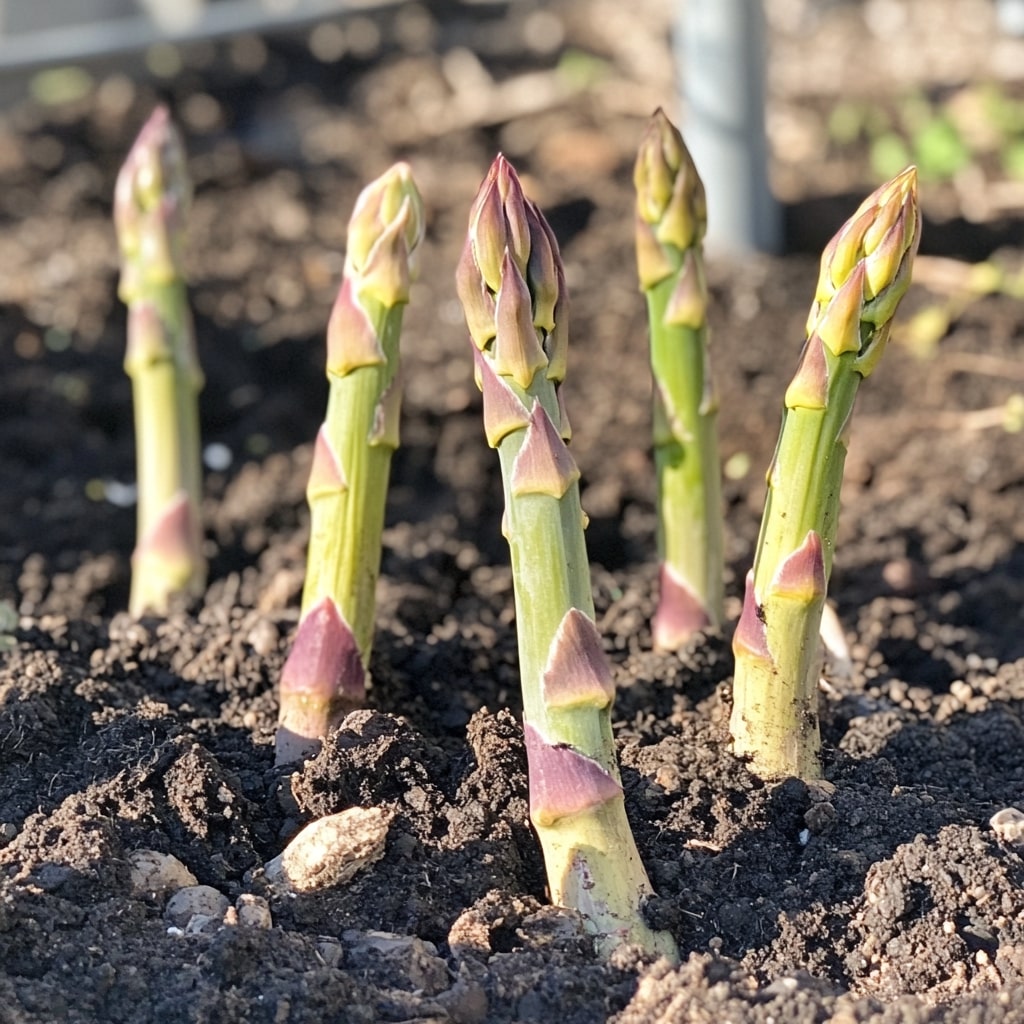
Use one-year-old asparagus claws from a reliable variety that is suitable for the Dutch climate. Plant them in April or May, once the soil has warmed up enough. Draw trenches about 30 centimeters deep and place the claws with the roots spread out on a ridge of loose soil. Cover them lightly and gradually fill the trench as the shoots grow. Keep sufficient distance between the rows so that air and light can reach the plants properly.
Care during cultivation
In the first two years it's all about strong root growth. Keep the soil moist but not wet and remove weeds regularly to prevent competition. In the spring, fertilize lightly with organic fertilizer and fill the ridges with soil to protect the shoots. Leave the young stems so that the plant can build up energy. Only from the third year can you start harvesting carefully, after which the plants will remain productive for years.
Planting and care
Planting out asparagus claws
Plant asparagus claws in April or May once the soil has warmed and is well-drained. Dig trenches about 30 centimeters deep and place the claws with the roots spread out on a ridge of loose soil. Cover them lightly with soil and gradually fill in the trench as the shoots grow. Keep sufficient distance between the rows so that air and light can reach the plants properly. Water generously after planting to stimulate root growth.
Care in the first year of growth
In the first year it is important to let the young plants strengthen and not to harvest them yet. Keep the bed weed-free and water regularly during drought, especially in sandy soil. A thin layer of compost or well-decomposed manure in the autumn nourishes the soil and promotes healthy growth. Check for snails and other pests and remove damaged shoots in a timely manner. This way the plant builds up enough energy for future harvests.
Maintenance of mature asparagus plants
From the second year onwards, the asparagus bed requires regular care. After the harvest period, allow the shoots to grow into foliage, which turns yellow in the autumn and is then cut off. Then apply a layer of compost to replenish the nutrients. Keep the soil loose and free of weeds, and provide extra water in dry summers. By fertilizing annually and maintaining the bed well, the plants remain productive for years.
Harvest and store
Determine the right harvest time
In the Netherlands, you usually harvest asparagus from the end of April to June, when the stems protrude about twenty centimeters above the spine. Prick them early in the morning with a sharp asparagus spear to prevent them from drying out. Check daily as they grow quickly in warm weather. Stop harvesting around the longest day to allow the plants to recover and build up energy for the next season. This way you keep the asparagus beds productive and healthy for years to come.
Clean and store asparagus
After cutting, carefully remove sand and cut the ends straight. Store white asparagus wrapped in a damp cloth in the refrigerator, where it will stay fresh for several days. Green asparagus can be stored dry in an open bag. If you want to keep them longer, blanch them briefly and freeze them. Avoid soaking in water for long periods as this reduces the flavour and texture. You can recognize fresh asparagus by a crispy break and a fresh smell.
Drying, freezing and preserving
To store asparagus for longer, you can dry, freeze or pickle it. To freeze, blanch the peeled stems for two to three minutes and cool them immediately in ice water. Drain well and package airtight. Dried asparagus is suitable for soups and sauces, while pickled asparagus makes a fresh addition to salads. Store the jars in a cool and dark place. This way you can enjoy the taste of your own harvest even outside the season.
High quality asparagus claws
Strong asparagus claws form the basis for a healthy and productive asparagus plant. Choose varieties that thrive in the Dutch climate, such as Gijnlim or Backlim, and plant them in well-drained sandy soil. Ensure sufficient planting distance and pay extra attention to water and weed management in the first year for a rich harvest.
View productAsparagus foil or backing foil
Special asparagus foil keeps the soil warm, stimulates early growth and prevents weeds. The foil helps grow straight, white asparagus and protects young shoots against cold, rain and wind. Place the foil tightly over the ridges and only remove it after the harvest period for best results.
View productOrganic fertilizer for asparagus
A balanced organic fertilizer with extra potassium and magnesium promotes strong root growth and a high yield. Apply the fertilizer in early spring and work it lightly into the soil. Repeat this annually to improve the soil structure and provide long-term nourishment to the asparagus plants.
View productRecipe inspiration

Asparagus soup
A super-green and super-tasty vegetable soup with a few simple ingredients, including spinach and shallots
View recipe
Asparagus soup with tartines
Goat's cheese toasts give a contrast in texture to this silky smooth soup - a special dinner party starter or seasonal lunch
View recipe
Asparagus risotto
Put asparagus centre stage in this satisfying risotto. Top with a sprinkling of parmesan for an easy midweek meal for two
View recipe